Daggok's Stab-ladz & Malevolent Masks
Thanks to Games Workshop for sending us a copy early for review!
Other Rivals reviews are available in previous articles!
In this blog, we give our review of the Daggok's Stab-ladz warband and the Malevolent Masks rivals deck, highlighting those cards you want to see early in the game and giving a basic run-down of strategy and rating.
Decks are available here: https://www.underworldsdb.com/rivals.php
Podcast: https://podcast.battle-mallet.com/e/episode-56-daggok-s-stab-ladz-malevolent-masks/
Daggok's Stab-ladz Unboxing Video
This Release's Reviews
Daggok Stab-ladz

Daggok Finkstealer
Daggok Finkstealer is your classic Orruk, with Move 3, 1 Block, and 4 Wounds. He has a fairly accurate Range 2, 2 Smash, 2 Damage attack, but his stand-out feature is the Krule Kunnin' reaction, where he gets the opportunity to make his other (less-accurate) attack action after a friendly fighter's Move action. He inspires when he deals damage to a second or subsequent fighter in the same phase and, when inspired, gains 1 Move, gets more accurate, AND jumps to 5 wounds (eat your heart out, Ironskull)!

Hurrk da Howla
Far and away our favorite model from this warband, Hurrk is rocking a sousaphone of Destruction, giving him the Roar of Kragnos reaction. As long as he doesn't make a super action, he can blow his horn and count as supporting all other friendly fighters within 2 hexes of himself! He's got the standard Move 3, 1 Block, 4 Wound profile, and a respectable 2 Smash, 2 Damage attack. Hurrk inspires when a friendly fighter he is supporting makes a successful attack action and gains 1 Move and gets more accurate.


Grakk da Hook
Grakk is unburdened by such frivolities as armor and shields, so he starts at 4 Move, 1 Block, and 4 Wounds. His Bita Flail is Range 2, 2 Fury, 2 Damage but has the Snag reaction. In short, instead of driving back, he can push the target of his (successful) attack in any direction. Grakk inspires if he makes the Snag reaction. When inspired, his flail goes to 2 Smash and he gains a Range 1, 2 Fury, 2 Damage Scything attack.

Jagz da Bleeda
Jagz is the pure beater of these ladz, ready to do some damage with one of his three Hakkas. He's Move 3, 1 Block, and 4 Wounds with a 3 Fury, 1 Damage attack with [Crit] Grievous 1. He inspires if an enemy fighter with 1 or more Wound counters is taken out of action. Note that he doesn't have to do the damage! When inspired, he gains 1 Move and his Hakkas go to flat 2 Damage (losing Grievous).

Key Cards
- Objectives: These are the objectives that we think you want to see early in the game, probably because they're easy to score OR at least easier to score early. if you don't see one of these three in your opening hand, consider discarding your objectives to redraw!
- Da Plan Wurked - You want the schemes and you almost always want to complete them (as it means something good has happened for you), so this is an easy early choice!


- Deceivin' Destiny - Score glory if your leader is attacked and survived (so could be a failed attack) OR if a 3-dice attack fails. Your warband wants to get stuck in the middle anyway and your best odds of survival for Daggok are early in the game!

- Storied Stabbin' - This objective (a coveted 2-Glory End Phase, no less) gets more difficult to score as the game progresses, so you definitely want it early!


- Gambits:
- Bust Their Ears - The first Scheme we recommend as it grants double supports on Attack and Defense! Also, it's best early while Hurrk is still alive.

- Outfink 'Em - We like this card because of the obvious effect (getting to draw more cards) but also the control aspect of making your opponent have to choose whether or not to play a power card and give you the benefit!

- Rush 'Em - A persisting +1 Move, and given the complexity of the condition, it's a Scheme that you can actually keep around for a while if needed!


- Upgrades:
- Big Bully - +1 Wounds! What's not to love?! Sure, there's the trade-off of making yourself Large, but 5 wounds are a lot to chew through.

- Deffproof - 1 Block isn't what it used to be, but 2 Block, with 1 or 2 Supports (thanks, Hurrk) can be a lot more formidable.

- Krule Braggart - Non-Objective Glory is always welcome!


Boards
Play Style
They are positional aggro, with a focus on the midfield.Playing Against This?
Take out Daggok and Hurrk.New Player Rating
Silver: The fighters have pretty forgiving profiles, bu the complexity of the Schemes and the positional nature of the warband mean they are a little too advanced to qualify for Gold.Nemesis
Malevolent Masks
Plot Card
Championship players rejoice! There is no plot card!
Key Cards
- Objectives:
- Feast of Violence - Lends itself towards aggro play, but it doesn't require successful attack actions.

- Hooded Stranger - End phase because you've hopefully gotten the glory to get one Mask on. It has the potential to grant you 2 glory as well!

- Solid Spread - Another non-Mask objective that just requires some positioning.


- Gambits:
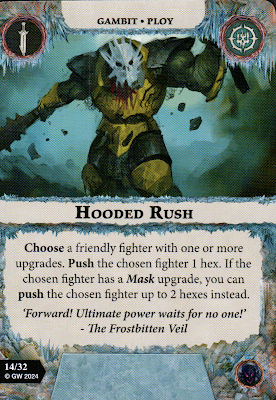
- Hooded Rush - We love a push card. Getting to push 2 if you have a Mask on is just great!

- Revealed Aspect - Draw a card (not really worth a Gambit, but it essentially gives you the chance to turn 1 of your Gambits into an Upgrade) OR give a Mask from one fighter to another without paying the glory.

- Unveiled Ambitions - Don't have the Mask you need or want? Just use this card to find it!


- Upgrades:
- Envy's Shroud - We love a +1 Wounds card. The fact that this one isn't restricted from Large fighters might be worth not being able to apply any other upgrades. 7 Wounds on Mir Kainan? Oof.

- The Eternal Smile - While Ricus of Carnage is an Action, getting +1 Damage to your Range 1 and Range 2 Attack actions for multiple future actions could be worth it.

- Vytrix's Eye - NOTE: This is not an Attack Action upgrade, so you could put it on Beasts (or Changers). But it also means that you cannot make the printed Attack Action as part of a charge.


